MVVM Light UITableViewCell bindings with Xamarin.iOS
When ever you want to display a list or collection of information under iOS tables are often the choice you will end up using. But what if you have content that changes and you want to update the data in a cell? Well that’s what bindings are for right? But how do you use bindings in a UITableViewCell? Well let’s check it out.
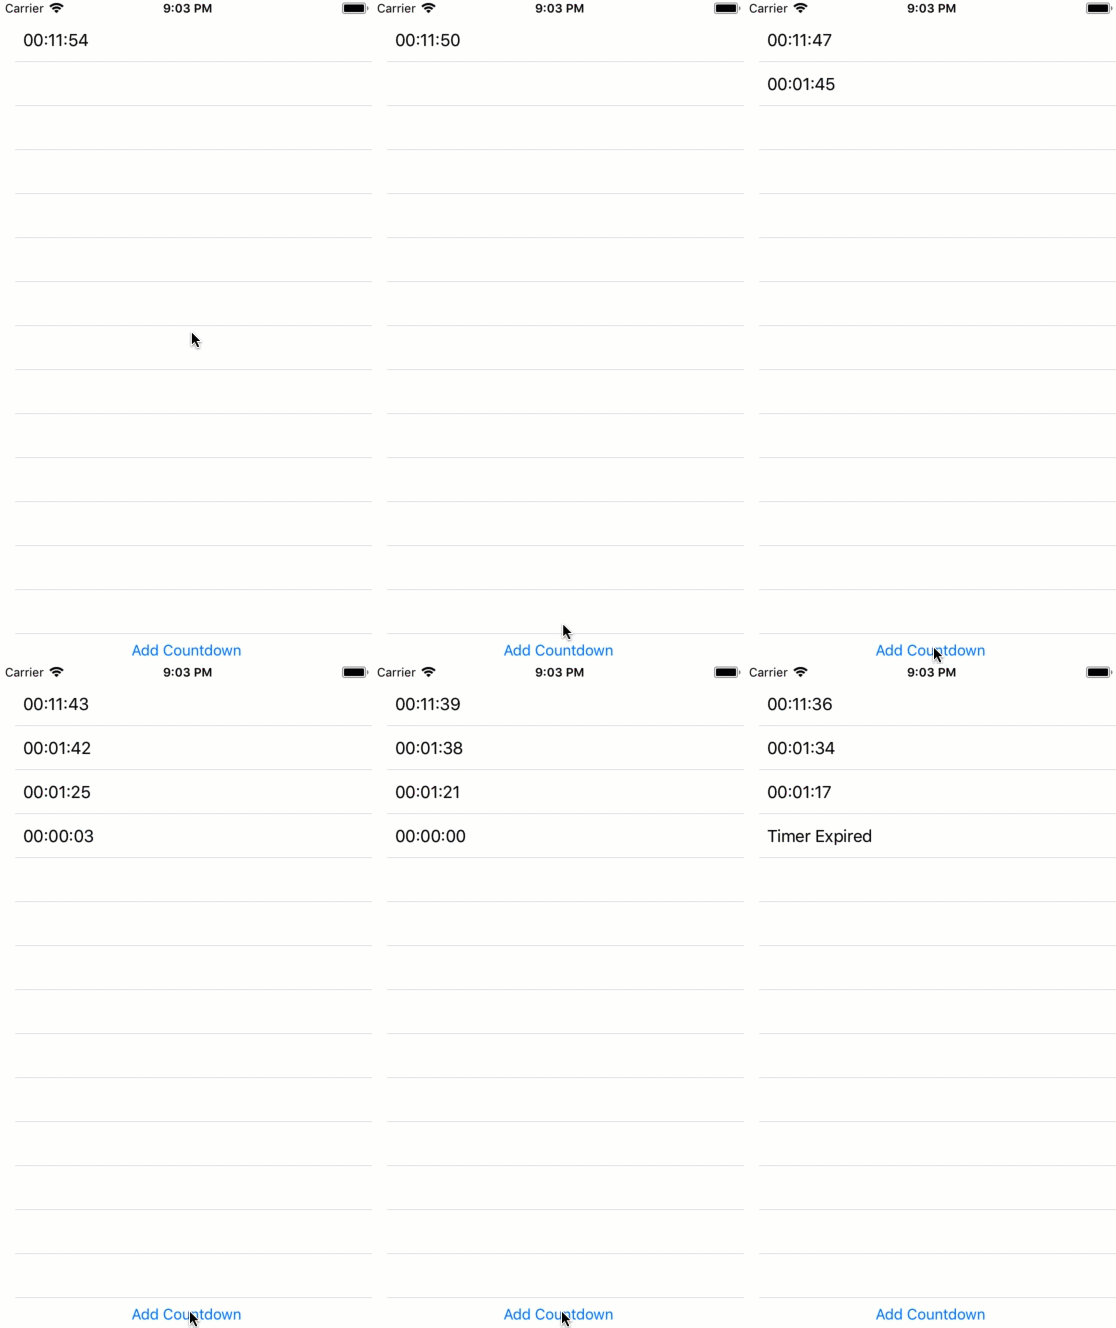
Welcome to our countdown app. As you can see basically it is a list of timers, that are displayed in a cell and updated as they are ticking down.
If we look at the basic setup of a displayed table, we will have UITableView which uses a UITableViewSource for managing the collection to be displayed and the rendering of the UITableViewCells. Then there is the view model which is providing a list of items, in our case timers, that should be displayed. So let’s go through each of the items from View Model to Cell.
The View Model
MVVM Light comes with helpers that allow you to convert an ObservableCollection to a UITableViewSource. Choosing this option will further ensure ensure the UI is updated when we add or remove an element to our collection. So let’s take it:
public class MainViewModel : ViewModelBase
{
    public MainViewModel()
    {
        // ...
        Countdowns = new ObservableCollection<CountdownViewItem>();
        Countdowns.Add(new CountdownViewItem(new TimeSpan(0, 13, 37)));
    }

    // ...
    public ObservableCollection<CountdownViewItem> Countdowns { get; private set; }

    // ...
}
The CountDownViewItem hold’s the state of the individual item. Hence the timer logic is embedded into it and will also implement the RaisePropertyChanged.
public class CountdownViewItem : ViewModelBase
{
    DateTime _expirationTimestamp;

    public CountdownViewItem(TimeSpan timespan)
    {
        if (timespan == null) throw new ArgumentNullException(nameof(timespan));
        _expirationTimestamp = DateTime.UtcNow + timespan;
        Countdown();
    }

    string _remainingTimeString;
    public string RemainingTimeString
    {
        get
        {
            return _remainingTimeString;
        }
        set
        {
            if (value == _remainingTimeString) return;
            _remainingTimeString = value;
            RaisePropertyChanged(nameof(RemainingTimeString));
        }
    }

    private async void Countdown()
    {
        while (DateTime.UtcNow < _expirationTimestamp)
        {
            TimeSpan remainingTime = _expirationTimestamp - DateTime.UtcNow;
            RemainingTimeString = remainingTime.ToString(@"hh\:mm\:ss");
            await Task.Delay(millisecondsDelay: 490);
        }

        RemainingTimeString = "Timer Expired";
    }
}
So let’s put these view models to use in the UI.
The Table View
One can choose to create the table either in a story board or in code. Choosing the code path we would have a UIViewController that creates the UITableView, set’s the layout and creates the UITableSource from the view models collection:
class ViewController : UIViewController
{
    // private members

    public override void ViewDidLoad()
    {
        base.ViewDidLoad();

        // Setup view and layouting

        // Setup bindings
        _tableViewController = Vm.Countdowns.GetController(CreatePersonCell, BindCellDelegate);
        _tableViewController.TableView = CountdownsTableView;

        AddTimerButton.SetCommand("TouchUpInside", Vm.AddCountdownCommand);
    }

    private void BindCellDelegate(UITableViewCell cell, CountdownViewItem countdownViewItem, NSIndexPath path)
    {
        var bindableCell = (CustomCell) cell;
        bindableCell.Configure(countdownViewItem);
    }

    private UITableViewCell CreatePersonCell(NSString cellIdentifier)
    {
        return CountdownsTableView.DequeueReusableCell(nameof(CustomCell));
    }
}
Note we are using a custom cell, and we are registering it to so we can reuse the cell. This will enable our app to reuse created cells I.e. improve the memory footprint, performance and is considered best practice. We will go into the details of that cell shortly.
If you are looking for the storyboard approach, note that this step and only this step will differ. Check out the GitHub repository for a sample.
The Cell
The cell is invoked when via the BindCellDelegate method. So we can populate our cell with binding like this:
public class CustomCell : UITableViewCell
{
    CountdownViewItem _countdownViewItem;
    // ui label and constructors

    private void InitCell()
    {
        // Layout cell
    }

    public Binding<string, string> _timerBinding;

    internal void Configure(CountdownViewItem countdownViewItem)
    {
        _countdownViewItem = countdownViewItem;
        _timerBinding = this.SetBinding(() => _countdownViewItem.RemainingTimeString, () => RemainingTimeLabel.Text);
    }
}
It is very important that you store the passed in view item as member variable in your method. If you do not do this, you will only see the initial value and the binding will never update the view!
Since we are reusing our cells we have to assume for one that our cells might have already been used by a previous item and that there might be an existing binding present.
Let’s remember that Bindings boil down to events. And when we register an event handler we should always ensure that we are not creating a memory leak I.e. that we deregister the event handler. MVVM Light provides the method Detach which will deregister the event handler(s) behind the binding. Now why is this important? Well lists tend to come with multiple items. Having a memory leak for each item tends to be a bad design strategy to say the least. Therefor it is important to ensure that the binding in the cells are detached when it is no longer used.
This is also the reason why we are using a custom cell. It allows us to override the method PrepareForReuse which is invoked every time a cell is being reused. In this method we can restore the cell to it’s initial state:
public override void PrepareForReuse()
{
    base.PrepareForReuse();
    _timerBinding?.Detach();
}
And that is how you can create bindings in a UITableViewCell.
Conclusion
In this blog post we saw how we can create a binding for a UITableViewCell. We also covered how to avoid memory leaks when reusing cells (and you should generally reuse cells). Generally do not use bindings for static content in cells as they might impact your performance. When ever possible do not change the layout (constraints) due to a change in the content. Though not supported by the UITableViewSource created by MVVM Light at the time of writing, try using different custom cells for different layouts.
You can find the entire app sample on GitHub.

