Azure Blob Storage - the simple storage backend for your Xamarin Apps
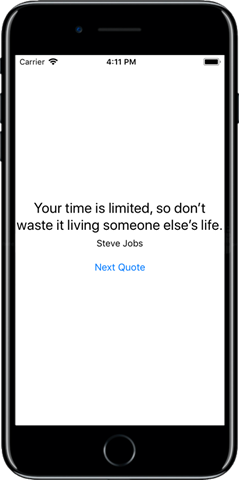
Some apps require quite a bit of content which is fairly static but changes over time and then the app should adjust and provide the user with the new content. Let’s assume we want an app that provides us with quotes and their authors. We could just add the quotes to our app but whenever we wanted to update the app we would have to redeploy our app to the store(s). This can range from an inconvenience to requiring technical expertise for updating the app for simply correcting such a simple thing as a comma. So it becomes evident that in these cases we would like to separate the content from the app itself.
Hosting content does not require running any logic on the server. We do not need any other service than that of a simple file share. With perhaps one or two additional requirements regarding security etc. but more on that later. And that is exactly what Azure Blob Storage can provide us with.
Setting up the blob storage
You are required to have an Azure Account to create a blob storage, the steps, therefore, you can find here. On Azure create a blob storage, under containers, create a Container if you haven’t done so already and then upload your data to it. In this sample, we will upload a single JSON file.
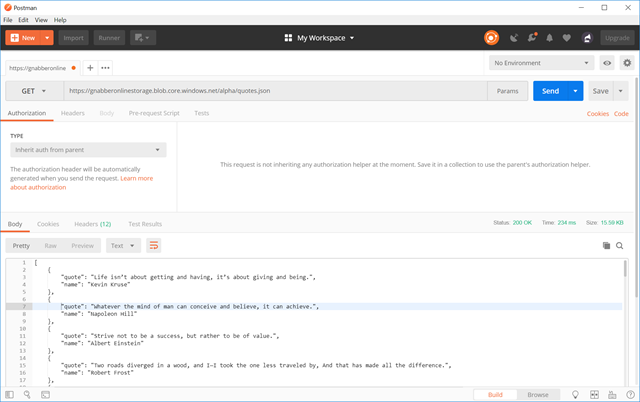
In a real application, we could also provide multiple other files including videos and other static files. But for this simple demo, we will stick to a lonely JSON file. We can access the content by calling the URL:
Having something on a public server always raises questions about security and the sorts. So let’s have a look at them.
Security
So let’s start with what you get out of the box. The easiest security is if your data is public. Like on a website but for your app. The default you can limit the anonymous access to your blob storage as follows:
- read-only container: which will allow everyone to read at the container level i.e. “look at the directory” and list all the blobs within.
- read-only blob: here the caller will have to know which blob he wants to open and is limited to reading the blob storage itself.
- no read access for anonymous: this will restrict the access to authenticated parties only.
In our sample, we will stick with anonymous blob access. But if you are interested in adding some extra layers of security be sure to check out the Azure Storage security guide which explains the different methods of authentication from shared keys all the way to using Azure Active Directory (Azure AD) for securing the access of your data. Which in summary means Blob Storage is not only quick and convenient in the beginning but can also be modified to add some serious layers of protection.
The client
On the client, we will want to consume the hosted resource and use it in our app. You can do this rather simply within a .Net Standard library using JSON.Net as follows:
string quotesJson;
using (var httpClient = new HttpClient())
{
    var response = await httpClient.GetAsync("https://gnabberonlinestorage.blob.core.windows.net/alpha/quotes.json");
    quotesJson = await response.Content.ReadAsStringAsync();
}
_quotes = JsonConvert.DeserializeObject<List<QuoteInfo>>(quotesJson);
While the above sample works and will get us our data it is not really smart, it will always pull the entire file even if nothing has changed. Fortunately, Azure Blob Storage supports ETags which allows us to be smarter when creating the call, by adding the If-None-Match header to our request as follows:
public async Task Init()
{
    if (_quote != null) return;

    IsBusy = true;
    string quotesJson;
    using (var httpClient = new HttpClient())
    {
        if(!string.IsNullOrEmpty(CurrentEtagVersion)) httpClient.DefaultRequestHeaders.Add("If-None-Match", CurrentEtagVersion);
        var response = await httpClient.GetAsync("https://gnabberonlinestorage.blob.core.windows.net/alpha/quotes.json");

        quotesJson = response.StatusCode == HttpStatusCode.NotModified
            ? ReadQuotesFromCache()
            : await response.Content.ReadAsStringAsync();

        UpdateLocalCache(response.Headers.ETag, quotesJson);
    }
    _quotes = JsonConvert.DeserializeObject<List<QuoteInfo>>(quotesJson);

    PickAndSetQuote();
    IsBusy = false;
}
If the local and remote ETag match, we will not receive any data with the call leaving us with a very small data footprint for this call. The code handling the caching is shown below. Note that for accessing the preferences Xamarin.Essentials were used:
public string CurrentEtagVersion => Preferences.Get(EtagKey, string.Empty);

private void UpdateLocalCache(EntityTagHeaderValue eTag, string quotesJson)
{
    // Only update the cache if we need to
    if (eTag == null || CurrentEtagVersion == eTag.Tag) return;
    Preferences.Set(EtagKey, eTag.Tag);
    File.WriteAllText(_quotesFilename, quotesJson);
}

private string ReadQuotesFromCache()
{
    if (!File.Exists(_quotesFilename)) return string.Empty;
    return File.ReadAllText(_quotesFilename);
}
I will leave it there with this sample but since we are already storing the data in a local cache we could also consider making this app fully Offline capable. With Xamarin Essentials, which we are already using, we can check if we have a network connection and what kind of connection. This information allows us to decide if we want/can access the remote storage or rather load the data from the initial cache.
You can find the entire client sample code on GitHub.
Conclusion
In this post, we saw how you can use Azure Blob storage as a backend service to host the content of your app without having to implement any web server. You can add security layers to the storage. Tracking changes on the backend are provided out of the box via HTTP ETags.
But how much will this cost me? Probably less than you would think but check out the Blob Storage pricing to get your exact number.


