Migrate your Xamarin App from PCL to .Net Standard
Update: Hey there thank you for reading my blog, since I wrote this post I have learnt a lot and have found a better way to migrate your Xamarin Apps so please check out my latest blogpost on this matter.
If you haven’t heard or dived into .Net Standard you are in for a treat. In short it provides a way to share code across platforms but in contrast to the PCL it gives you so many more platform specific features. For an in depth overview check out the official docs.
Note: If you are starting a new Project today with Visual Studio (VS) 2015.4, you will not be able to select .Net Standard by default. But the new templates for .Net Standard will be included in Visual Studio 15.5.
Creating the .Net Standard Class Library
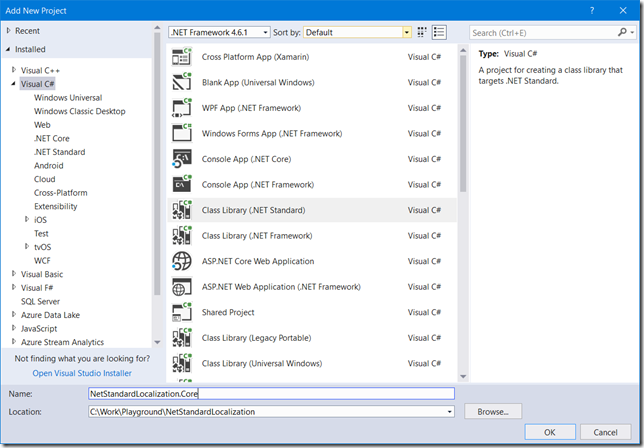
Migrating an existing app to .Net Standard is pretty straight forward. Step one add a .Net Standard Library to replace your PCL project.
Migrating your source code
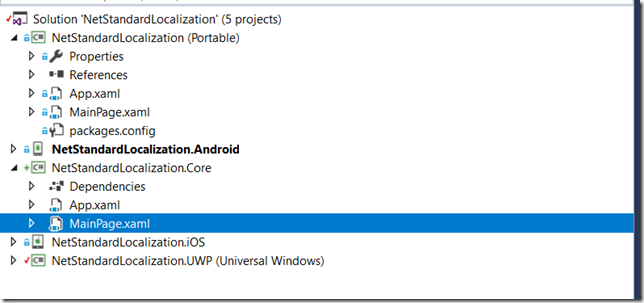
Then drag and drop all of your existing files from the PCL project to your .Net Standard library. Note that you don’t want to copy the packages.config or any of the files under properties.
Now you can delete your PCL project that you have migrated. If you do so from Visual Studio note that the Project is still available in the file system. Which means you still have it if you forgot something, but also means that you will have to delete it later on if you want to remove it from the source control workspace.
Next step is to add all the NuGet packages you have used in the PCL project. If you are having trouble adding some of the packages look out for NuGet packages that are no longer needed due to .Net Standard support such as file system access. In other cases it could be because the NuGet package has not (hopefully yet) migrated to .Net Standard. In that case check out this post and don’t forget to ask the maintainers of the project when the project will be available for .Net Standard 
Hooking up the projects
You can now add the reference to the .Net Standard in your Android and iOS project. If you created a new namespace I strongly recommend you refactor them after adding them to your projects. Or else your refactoring tool of choice will only do half the magic and you will still have some work left to do.
If you are using a UWP project please read the section bellow as you will need to make some additional steps to make it work.
Fixing the csproj for Xamarin Forms
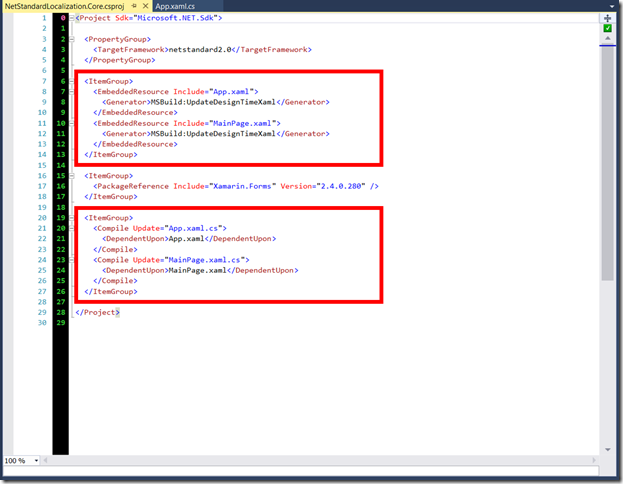
Unfortunately when moving a Xamarin Forms app over to .Net Standard you will get weird compilation errors. The cause of this is that the XAML files are referenced in the csproj file:
Simply remove them as they are not needed and the compile errors should be history.
When using UWP
If you are using UWP as a target (I.e. using the default Project provided up to VS 2015.4). You will have to remove and add the project anew:
If you are unsure if you really have to update your UWP project. Check if you have a project.json file in your UWP project. If the answer is yes, I’m afraid you will have to follow the following steps.
- Remove the UWP project from the solution in Visual Studio
- Rename the UWP project folder in the file explorer
- Add a new UWP project in Visual Studio (with the same name as the one just removed)
- Set the minimal supported Windows 10 version to the Fall creators update
 - Add any NuGet references the just removed project had (you can peek into the project.json file in the renamed location if you are unsure which packages to add)
- Copy and paste all your UWP files (except the project.json)
- Add a reference to the Standard Library project
If you know an easier way to upgrade a UWP project, please let me know in the comments bellow 
Conclusion
In this post we went over the steps required to migrate an existing PCL project to .Net Standard. All the steps were done with Visual Studio 15.4.


