.NET MAUI Device Runner Unit Tests
Automated tests can be a great timesaver when developing any kind of application. Some pieces of code can be harder to test automatically since they require a dependency on an external ressource. When writing .NET MAUI apps this often means that a piece of code or library requires to run on a platform to perform it’s function. This is the time when running your code on a device or emulator becomes mandatory. So let’s see how this can be done.
Before we start looking at how device running tests are implemented. Let’s quickly discuss when these tests can be of great value. Generally speaking it is often a good idea to write your app in a way that your business logic does not have any dependency on any external parts. In C# this is usually done via Dependency Inversion and Dependency Injection. But if you are writing the code that interacts with a platform, the very reason of existence for that code is to be dependent on a given platform SDK. In those cases using device running unit tests will be a great time saver.
App setup
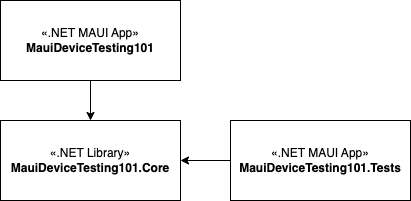
The sample we will be using does not require any platform specifics, but it will highlight how we have to architect our app and how to setup the test project. As a test project we will use the Hello World .NET MAUI project and add a ViewModel which takes over the code that is implemented in the code behind. The ViewModel will be placed in a class library and the .NET MAUI app will reference said library. The test project will then reference said library. Giving us the following projects:

The ViewModel implements the counter logic and uses the Community Toolkit MVVM library:
public partial class MainViewModel : ObservableObject
{
	[ObservableProperty] private int _count;
	[ObservableProperty] private string _text = "Click me";

	[RelayCommand]
	public void CounterClicked()
	{
		Count++;

		if (Count == 1) Text = $"Clicked {Count} time";
		else Text = $"Clicked {Count} times";

	}
}
Setting up the Device Runner Testproject
With the projects and code to test in place, lets move along and implement the test project. We start out by creating a new .NET MAUI application and deleting the following files App.xaml, App.xaml.cs, AppShell.xaml, AppShell.xaml.cs, MainPage.xaml, MainPage.xaml.cs . Next we will install the Shiny.Xunit.Runners.Maui NuGet package, created by Allan Ritchie. And change the Program.cs to look as follows.
public static class MauiProgram
{
    public static MauiApp CreateMauiApp() =>
        MauiApp
            .CreateBuilder()
            .ConfigureTests(new TestOptions()
            {
                Assemblies =
                {
                    typeof(MauiProgram).Assembly
                }
            })
            .UseVisualRunner()
            .Build();
}
With this our Device Runner Testsetup is complete and we can go ahead and implement a test:
public class MainViewModelShould
{
    [Fact]
    public void IncrementcountOnCounterClicked()
    {
        // Arrange
        var sut = new MainViewModel();
        // Act
        sut.CounterClickedCommand.Execute(null);
        // Assert
        Assert.Equal(1, sut.Count);
    }
}
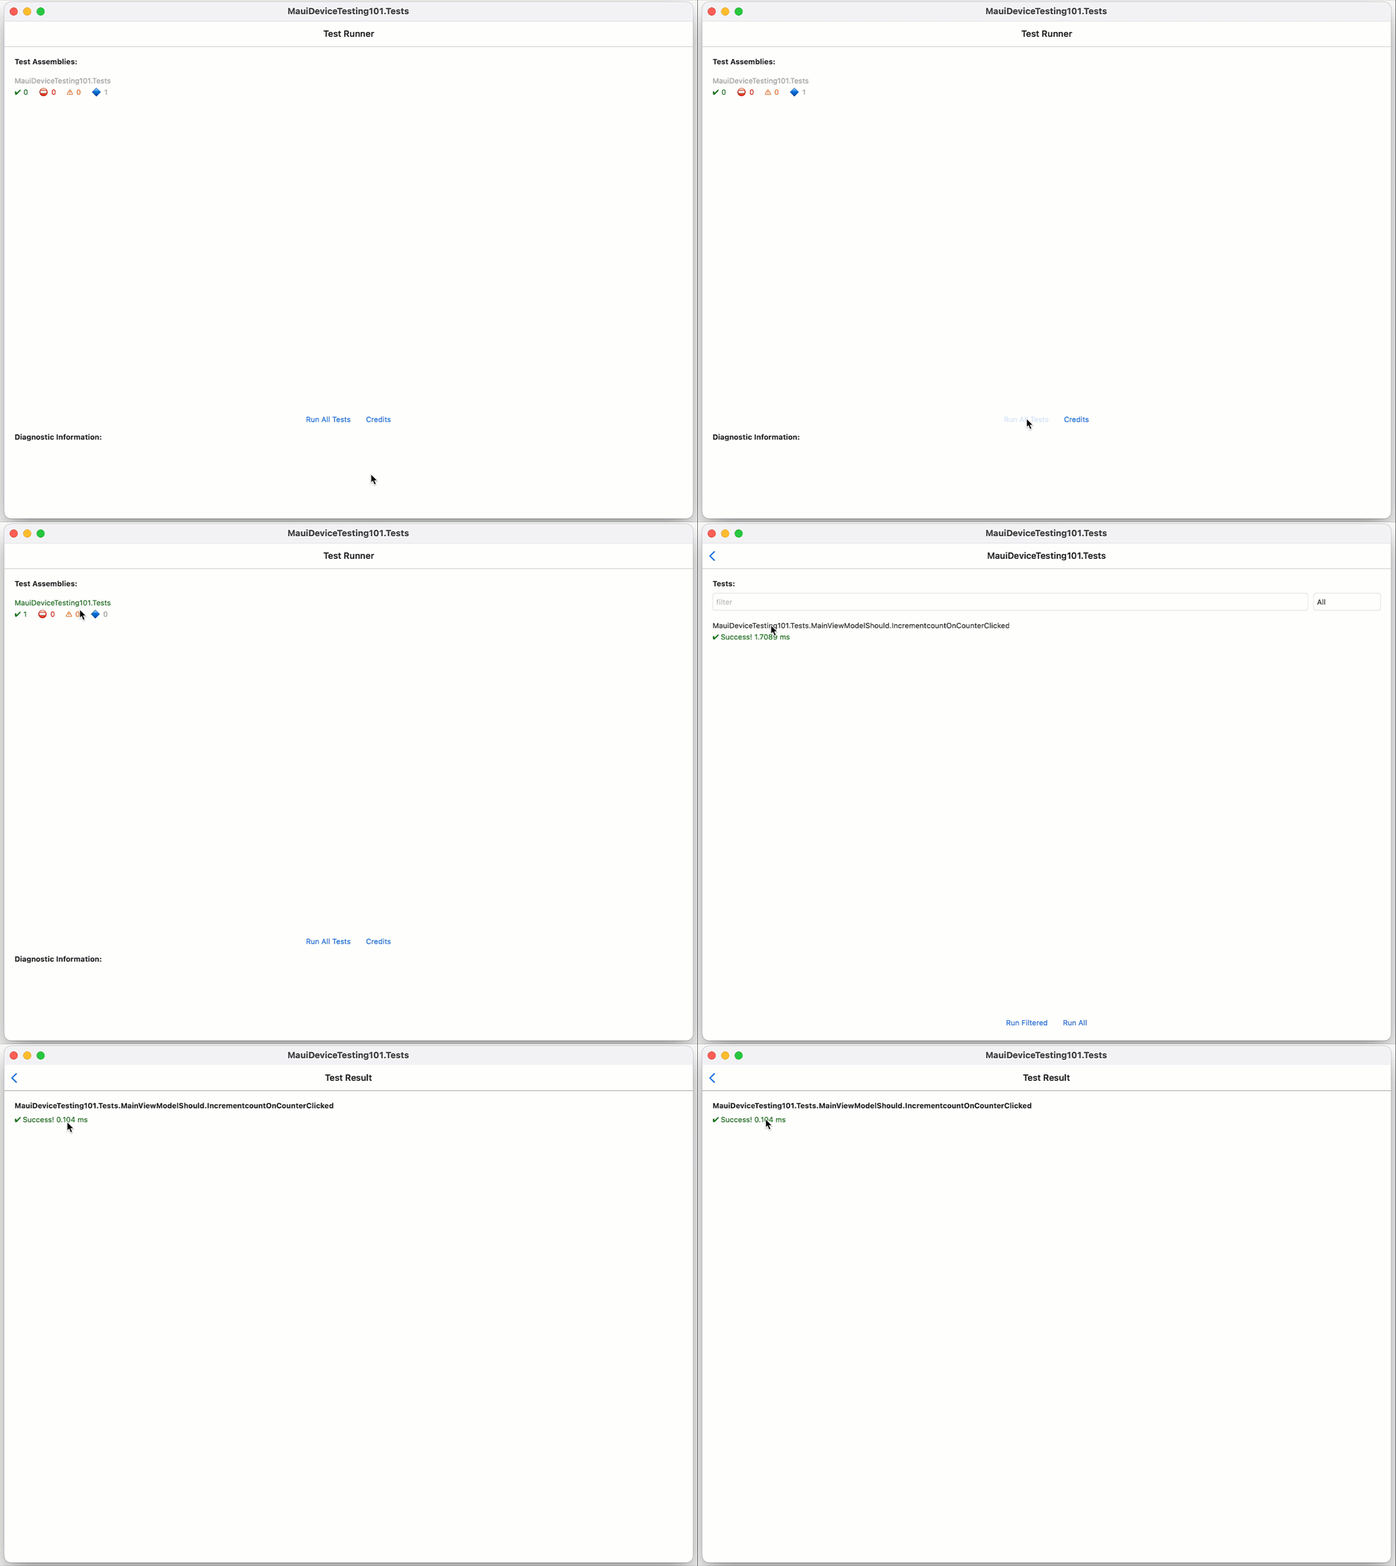
With that done all that is left is to execute the device runner project and tap the button to run the tests.

Conclusion
To run device tests requires some adaptation how a .NET MAUI project needs to be setup. By extracting the business logic we can reference it in our Device Runner MAUI project. The tests are based on the XUnit Testing framework.
You might wonder. Should you run all your tests from now on using device runners? Short answer probably not. While running your tests on a device will also check your logic. It will further allow you to see how well code performs on a device. But even though you can get these additional insights, it takes longer to execute. Plus running the tests always involves waiting for the device/emulator to start and then tap a button. Therefore I would recommend to use device runners when testing code that requires running against a device sdk, or to explicitly test if your code is able to run on a specific test device.
You can find the complete sample on GitHub.
HTH
