Using custom fonts in Xamarin.iOS
When developing an app your design might require to use a font that is not available from iOS out of the box. So let’s see how a custom font can be added to ones app and how to use it in a Storyboard or Code.
Adding the font
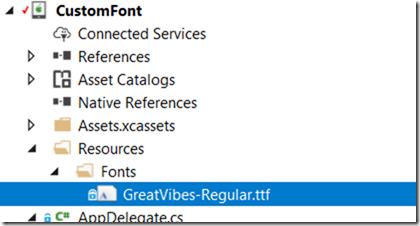
Assuming you already have the font, note that iOS supports fonts that are stored in TTF or OTF formats. Custom fonts are copied into the Resource folder of your iOS project.
Ensure that the properties of the font file are set to BundleResource.
Creating the Fonts subfolder is optional. But since the Resources projects tends to collect a couple of items in larger projects. Let’s tidy things up from the start 
To use the font we will have to update the Info.plist file with the following lines:
Note: At the time of writing in Visual Studio 15.5.4 you will have to open the Info.plist file in an XML Editor. For this right click the file and select “Open with…” then choose the XML (Text) Editor. In Visual Studio for Mac the GUI Info.plist editor supports editing the source directly.
Using custom fonts in Storyboards
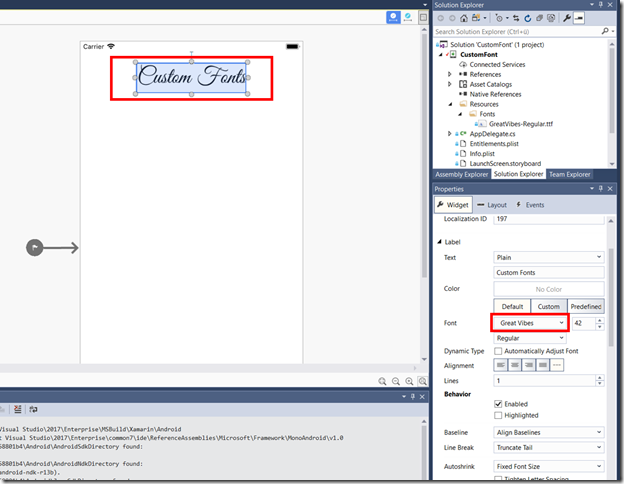
After adding for example a UILabel to the storyboard, select it. In the options click on the font and choose the custom font.
Using custom fonts in Code
In code behind using a custom font is pretty straight forward. For example in a label we can set the Font attribute as follows:
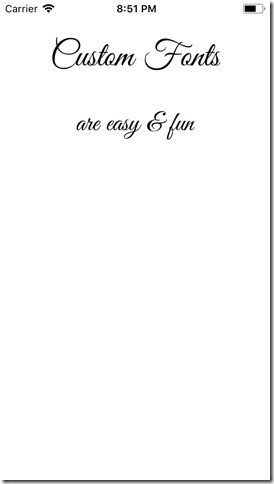
The result when running app with the combined storyboard and new label is:
Conclusion
In this blogpost we went through the steps that have to be taken to add a custom font. Note that fonts are loaded during the start up of the app and if you go bonkers with them you might notice some performance impact.
You can find a small sample on GitHub. For setting the constraints in the code defined UI PureLayout.Net was used.


